1102: The Offering

Tucked away in an inconspicuous corner of the deserted clearing, nestled almost invisibly among the leaf litter, the first signs of civilization were found in the form of a rough-hewn but definitely hominid-worked paper offering. For whom, to what, why … we shall never know:

Followers of the blog will notice occasional references to paper making pursuits. This post looks at the most recent results of a paper making workshop I attended in early July 2023. I had previously (back in 2019) been a member of PAQ (Paper makers and Artists, Queensland) but found full time work made attending events difficult. Now I am retired I have more freedom, so reapplied for membership.

The group’s interests in paper are diverse – from botanical paper making, monoprinting, encaustics, stitching, collage, pulp sculpture and more – my interests are (fairly narrowly?) folding, but it is important to have ones interests informed by a wider palette so I am very much the learner in that group.

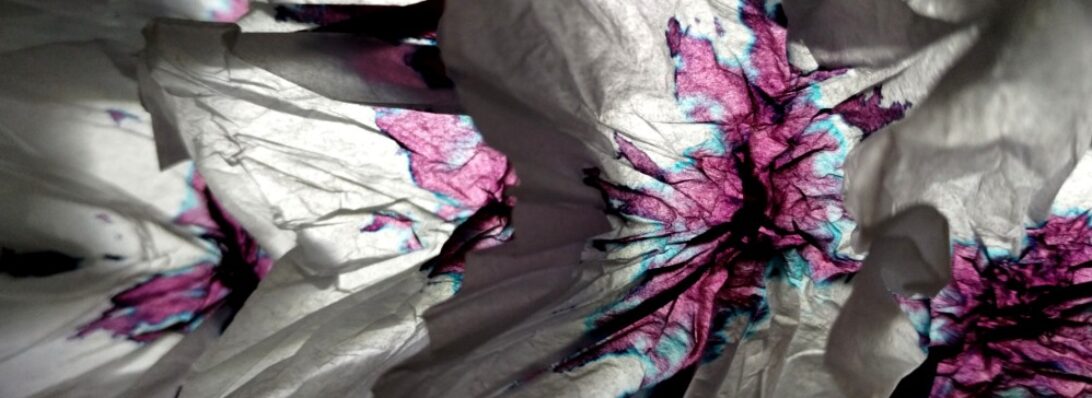
Previous workshops I made sheets with finely beaten banana stem and cotton display board, day lily and lemongrass pulp, and still have some of the paper from that session. This session we pulped banana stem (coarsely this time) and mixed it with lemon grass, Philodendron, and South African Pigeon Grass stem, in various combinations. The pulp was added to water, then a suspension-aid made from water soaked chopped okra, which generates a mucilage that makes the vat water more goopy, helping the pulp to stay in suspension longer before settling out. The results were much coarser paper, but it presented an interesting challenge to see what I could fold from it.

I first pressed then dried my sheets, brought home still dripping. I carefully separated them from their couching sheets (old torn up bed linen) and selected sheets to process further. Using a fairly stiff batch of Methyl Cellulose, I stuck sheets to my glass and let them dry, reasoning (correctly it turns out) that the MC would make the sheets more pliable and bind the fibres more closely together (given some of them were very loosely bound, this seemed like a good plan).

Continue reading

1101: PBS Colour Change Lizard

I was asked to test fold a model from Peter Buchan-Symons’ new book in progress “Folding Fantasy 2”:

This is a colour change lizard – there seems to be a resurgence in interest in precise figurative 2-d depictions of complex shapes via colour-change at the moment. This model cleverly exposes parts of one side of the paper, hides others with the reverse side and designing such things is a real skill.

The instructions for this model are clear, paced well and really approachable. Knowing Peter’s work, the book will contain a real range of complexities (certainly FF1 was a wild ride of simple through to very tricky models – a good one for your bookshelf).

I look forward to more opportunities to test out his designs, he does things differently to other designers, and variety is a good thing when looking for an approach to solve particular design problems.

Folded from a 21cm square of Indigo print Tuttle bi-colour paper, you could go smaller but would need to be careful not to lose the thin zig-zags that are the front legs and tongue.

1100: Steven Casey’s “Clownfish”

I have the privilege of being asked, from time to time, to test fold origamists new models. Steven Casey (designer of the BEST origami echidna there is) asked me to test his new design for a clownfish, naturally I jumped at the chance:

I took a 6″ square of regular origami paper (orange on one side, white on the other) and, armed with disbelief that this was the suggested paper size, began folding.

My fold approach over the years has changed markedly – I fold until either (1) I get to the end or (2) it fails, and I learn something. I FULLY expected this to go wrong – my fat clumsy fingers do not normally fold those small squares of origami paper people keep giving me (with every good intention), and for LOTS of this model I resorted to my favourite set of bent-nose tweezers just to keep it sharp (and not mush with said fat clumsy fingers).

It became pretty apparent early on that the fold sequence was entirely achievable with 6″ (15cm) squares, resulting in a charming little totally recognizable nemo. I made a few cosmetic suggestions to the diagram set (sometimes the designer lets me edit their diagram directly) and repeated the fold on 17cm square – I liked the smaller one better but it was prolly because I rushed the second fold while paying attention to the telly instead. I would like the head/gills to lock on to the body a little more and the fins also to stay together, but these are minor unimportant quibbles.

I am hoping Steven is planning a book of his new designs, this one is lovely and reminds us all that “you just gotta keep swimming”.

1099: Songbird

To mark the release of Phạm Hoàng Tuấn’s new book, he released a photo sequence of a little songbird on Fakebook:

Hundreds of development photos lead you (sort of) through the exacting process of folding this little wren-like bird. I decided to throw some nice paper at it.

The suggested size the author used was 20cm, so I went 35cm square, thinking I would have been safe, but should have looked ahead as it got waaaay too thick due to layers really quickly. Not to be deterred, I thought I would try to shepherd the now clearly wrong paper through a torturous fold,

In the end, some features (like the head) were really clumsily folded due to thickness, but I am pretty happy with the number of bird-like features I was able to tease out of this lovely sheet. I was also reminded of an important lesson – choice of appropriate paper is REALLY important on complex-supercomplex models.

I posed and stabilised it as much as possible, and will prolly fold it again some other time. The photo sequence was super annoying to use – it kept timing out (google drives get lazy) and so many of the photos showed indeterminate actions at times I was left scratching my head thinking “what is actually being shown here”. Beggars cannot be choosers however, so I gave it a red hot crack.

Continue reading

1098: Dumb and Dumber

I love a clever conceptual fold, and “Emptyhead” designed by Boice Wong (origamibyboice) is a clever example of art designed to make you think:

The first of these models – “Emptyhead I” is a lovely character that has an empty box sitting on his shoulders for a head. This model, uses a variation of the original CP (crease pattern), and represents his dumber brother completely detaching his head from his shoulders.

The original, as folded by Boice, has a solid cube for a head, but I Macgyvered a scheme to make it an open 2x2x2 cube instead, so he is clearly related to his more sensible brother.

From a 32 grid, this model cleverly presents shoes, cuffed pants, dress shirt, tie, collar, overcoat with lapels, 1 regular arm and one extra long arm, part of which becomes the box head. Such a neat design, the paper cleans itself up and provides wraps to make the seams tidy on the arms also. All this with no cuts, folds only. I did resort to using a few white glue spots to keep seams and layers in place, but tried to keep it as au-naturel as it was possible while being able to pose him for archival purposes.

I must admit to obsessing about this version, having solved the CP for the first version fairly quickly (which really surprised me if I am honest). I just assumed this version would let me make the free box head, but as I discovered, turning the long pleated tube into an open-ended box, when there was so little paper was a major issue.

Continue reading

1097: Jetlag

Those who know me realise I am just back from nearly 7 weeks in Europe. When asked how my jetlag is going, it is difficult to put the answer into words:

Spending so long in a different time zone, and getting good at waking early, being on the go to many and varied locations, then being subjected to 29ish hours transit to return to the other side of the planet is always a struggle, but this time it seems to have been worse. Bouts of fatigue followed by being wide awake at 3:30am are exhausting, as is my numb and seemingly empty brain.

This is my test fold of a new Boice Wong design. Boice is a crazy talented origami designer who released 2 versions of this model while I was overseas. He graciously released the CPs (crease patterns) and … they did not look too hard … but have taken nearly a week to decipher with my head in it’s current state.

Entitled “Empty Head 32×32 grid”, this is the first of 2 models in this series I intend to try, and feel a little guilty using up a blog number on the test fold, but I am so happy with how this little guy turned out I thought why not. When I have both figures, I will post again using a new blog number.

Continue reading

1096: WXYZ

I was approached by the publishers of the book “MODULAR ORIGAMI – 18 Colorful and Customizable Folded Paper Sculptures” by Tung Ken Lam, and asked for my impressions:

I received it just before going on an overseas holiday, so have only just begun exploring this soft cover edition.

I decided to start with some pure geometry – the result of 4 planes intersection each other – a wxyz.

The instructions are well laid out and easy to follow, I chose 12 sheets of paper, 4 colours, 3 of each. The module reminds me of the XYZ that I have folded previously, but the cunning use of 60/30 degrees in the construction lets all 4 planes nestle accurately together in a rather pleasing way.

Continue reading

Day Tripping to Zaragoza

So a fairly well known fact in Origami circles is that there are Origami Museums, few compare in size to the Spanish one in Zaragoza.  When Jo and I had decided to spend time in Barcelona, we discovered Zaragoza was doable day trip from Barcelona Sants regional train station, so a plan was hatched.

Barcelona Sants is a regional rail hub, different to the metro. We will from depart here in a few days for Province, but this station also provides access to many other places in Catalunya and beyond. After locating our platform ( via a very helpful man at the Information counter), we had our bags (and everything else) xrayed before arriving on the platform to find the train already boarding.

We boarded AVE-S112 High Speed train, allocated seats a lot like an airplane, and took off. The train sped underground until it cleared the central city and burst out into the light as farmland flew by. For a lot of the journey the train was topping 295 km/h as it hurtled stop to stop.

After a little over an hour, we arrived at Zaragoza train station, and de-trained, got some refreshments then headed over to the Bus Station, to catch a C1 circle line bus, and rode it the remaining half way around to the terminus. After a brief bit of nav we were picking through the back streets to EMOZ, located on the 2nd Floor of Centro de Historias, Plaza San Agustín 2.

I had been in contact with the museum ever since there seemed a chance for me to visit, and it was lovely to finally meet an online friend named Jesús Artigas. We nerded out a bit, talked about the current exhibition and about Yoshizawa’s works, and particularly the work of Eric Joisel. 

The museum has, on display a number of Joisel’s original works, including one of his gnome orchestras, his large-scale Rhinoceros and his large scale Pegasus.

Jesús let us sneak peak in the store room at Joisel’s large Hippopotamus also, all master works from a genius artist much missed. 

We talked folding, design, and it turns out he is working on an interesting origami publication of endangered Spanish animals, and asked if I was interested in test folding closer to publication date. What an honor indeed, naturally I said yes. That should be fabulous and something else to be involved in when I finally return home.

We parted company with the promise of future collaboration, then Jo and I took our time appreciating the many rooms of exhibits. It was good to see so many original works from legends in the field, including Victor Coeurjoly, Robert Lang, Junior Fritz Jaquett, Kashiwamura, Jozsef Zsebe, a host of different Vietnamese designers, and even a tiny work from Yoshizawa himself. We are not worthy.

The museum also offers informative information about the paper/folding traditions of many countries. It is interesting that many different schools of folding crafts emerged independently with the introduction of paper and paper-like materials. We also saw some very early traditional folds pioneering skills from historical giants that modern day origami designers stand on the shoulders of.

The feature artist at the moment is Vivian Berty, with a number of rooms devoted to her colourful, figurative and representational varied art practice. Such a riot of colour and range of simple to elegant models, compositions and modular works.

It felt like home for me, to be surrounded by an art form I have spent a lot of my life exploring. Nerd-feasts come in every flavour, and this was one of mine. 

After leaving EMOZ, we reversed our journey to Zaragoza Delicias rail station, grabbed a late lunch and then our train back to Barcelona. I am sure I gushed, Jo was very tolerant of a very happy nerd. If I get the opportunity I would like to visit again, as well as explore the other origami museums of the world.

1095: A Wing and a Prayer

Having just treated my first 2 bits of Wenzhou paper, I was itching to fold something (and running out of time to do so). I decided on a Praying Mantis, designed by Jo Nakashima model that I have not yet folded:

Jo Nakashima's Praying Mantis

Based on a 40 grid, using fairly standard box-pleating tricks, this model is a lot of fun to fold. Jo helpfully provides diagrams that detail how to efficiently and accurately lay in the crease pattern (check it out here) and in doing so I learned a LOT about treated wenzhou: It is deliciously thin, crisp and really strong (it allowed me to bugger up a collapse 2 times before getting it right, without paper fatigue). One thing I did not expect was it’s relatively poor reversibility – ie. you fold in one direction and then turn it accurately inside out. I was expecting it to be easier to reverse.

Jo Nakashima's Praying Mantis Views

Instead of “parachuting” (apparently a CP solve no no), I used the central axis and formed the head, thorax and as a consequence formed the front 2 pairs of legs. The abdomen collapse is fascinating and bends back under the wings making it really tidy all round.

Continue reading

1094: Travel Fold 2023

One of many habits I have developed, when travelling, is to “art bomb” the places we stay:

Jo Nakashima's Kangaroo

I take origami paper on holiday (like, who doesn’t, right?) and like to hide a finished cute model somewhere in our accommodation, restaurant, ferry, funicular or whatever for either the owner or a subsequent guest to discover – meant as a nice little surprise.

As an Australian, I try to include aussie flora or fauna, and memorize the fold.

Jo Nakashima's Kangaroo scale

If I am to be completely honest, I am astonished I have never folded Jo Nakashima’s “Kangaroo” before. It is a little charmer. I have a pack of indigo Tuttle paper that will be perfect for this, so it is sorted (apart from the practice needed to fold it from fading memory).

You too can fold along with me – Jump here for video and diagram tutorial

1093: “An Origami Journey”

Avid noticers of this blog will realise that, since 2011, I have been rapidly expanding my abilities as a folder. Like most people, my first ever origami experience (apart from largely unsuccessful paper planes) was an origami crane (Tsuru) – taught to me as a boy of 11 yrs by a Japanese exchange student. A few years back I completed my task of learning how to fold Satoshi Kamiya’s “Ryujin 3.5”. This fold is not unrelated to both events:

Brandon Wong's "An Origami Journey"

Crane to complete Eastern Dragon is quite a journey, learning all sorts of new techniques and refining skills along the way and this fold celebrates that very journey. Originally designed and folded by Brandon Wong (@ThePlantPsychologist) – I first saw his fold on Instagram, and then photos of it on OrigamiDan (a discord server I am a member of) and vowed, one day, to fold it.

Brandon very kindly published the Crease Pattern along with photos of his fold, and right now I am rapidly learning to solve crease patterns so the perfect storm emerged after retiring I have time to tackle more ambitious folds.

Brandon Wong's "An Origami Journey" 360 view

After gridding the 90cm square, I set about laying in the exacting additional creases needed, including a puzzling pythagorean hinge line and some baffling level-shifters. Collapsing was a …. process. Apparently I “parachuted” the model – starting at the edges and working towards a bulging centre is termed parachuting (which is something I must address) until it more or less sat flat. After checking in with Brandon (isn’t the internet amazing) he suggested a fix for the only collapse kludge I had on his right shoulder.

Continue reading

1092: Riccardo Foschi’s “Frog/Toad”

Few origami designers design, present and then release CPs, diagrams and tutorials for their work like Riccardo Foschi:

When I saw his newly designed frog 2 days ago, I was hoping for there to be a tutorial or CO soon, his tutorial dropped yesterday and I knew I had to fold it.

I used a square of Duo Thai paper – dark and lime green and folded it slowly to enjoy the demonstrated process.

The front end of this frog/toad is wonderful – big whimsical eyes, beautiful suckered feet, nice shaped head. My only criticism is that the back legs and bum are a little stubby – there is quite a bit of paper back there that is not doing a lot, but as is it is simplistic. None the less, I love this little chap.

Continue reading

1091: 林靖詠’s “Man Folds Crane”

I am interested in meta-folds – that is origami designs that are about origami, I stumbled across a series of 4 images of a man (torso) folding a crane on a routine image search for something else and decided I had to track it down. It was re-posted by a re-poster of the original and took some finding but this little beauty finally gave up some prototype Crease Patterns (CPs 1, 2, 3 and 4) and final images and I knew I had to try them:

I took my 90cm medium-thickness roll of Kraft and carved off a square, divided it into fifths, then halved until I got to 40ths, then split the big square into 4 equal smaller squares – each now a 20×20 grid.

Each figure has a different crease pattern – not sure why. I am fairly certain they were all variations generated by Boxpleat Studio (a program that takes stick figures and works out CPs), but I decided to persist – some worked perfectly, some were more of a challenge than others to collapse, each more or less made the formation of the man and the part of the crane easy, but had to nut out some things that were trickey.

I like this design, and am still working on the best way to display it – I am thinking eventually a shadowbox frame might be best.

Continue reading

1090: Kusudama Ball

Stumbling through my socials, I noticed a video tutorial of a reverse-engineered model originally designed by Ekaterina Lukasheva and knew I needed to try it:

kusudama ball

This 30 unit modular ball is a lovely bit of engineering, you make a bow-tie shaped unit and then, via a series of really positive locked tabs in pockets you form groups of 3 units that swirl around 5-unit shaped holes.

I chose Tuttle indigo dye duo paper and split each sheet into 4 squares, meaning the units were small but manageable. Construction was fairly easy – the units lock together fairly well but during construction the whole structure is really floppy. It is not until you have a near sphere that the paper tension kicks in and stabilises the shape – the final unit pulls the sphere round.

kusudama units

The Tuttle paper was a little thin, structure-wise, but folding this from thicker paper would begin to compromise the accuracy of the folding, making it less spherical – an interesting balancing act.

Continue reading

1089: Caiman

A caiman is an alligatorid belonging to the subfamily Caimaninae, one of two primary lineages within the Alligatoridae family, the other being alligators:

Caiman

When is a Crocodile not a crocodile – when it is an alligator, apparently.

This model has taken me an age for a number of reasons. The model, a genius design from Jeong Jae II (taken from the book “Origami Pro 6 – Wild Amazonia”) has over 300 diagrammed steps (worse, many are “repeat x-y, in reverse upside down”) and every part of the square is worked, then re-worked in many and exacting ways. I wanted to understand and enjoy the processes I was performing and some of them took time to do precisely.

Not rushing to “set” a crease is an important tenet here – until the crease is set there is still time to change it, once set it is permanent damage to the sheet – I tried really hard to set the creases in the correct place.

Caiman views

Scaled/pleated models always fascinate me – the design strategy behind HOW these are designed are completely beyond my comprehension – pleats and scales take a LOT of paper, so planning what is done and where is exacting. Following the set of instructions is complex enough but there are some who could fold this monster from a crease pattern (CP) alone – but not by me – that still is beyond my ability.

A quality design looks good with folds alone – and when I had laid in all the creases and roughly shaped it, the model was already wonderful. I did a little bit of cleanup – closing gaping seams with spots of glue, closing the underside of the tail to give it volume and wires in the legs for permanent posing. Remarkably little was needed to make this presentable.

Continue reading